At the end of this chapter, you will be able to:
- understand when to use tube suctioning
- demonstrate how to perform tube suctioning

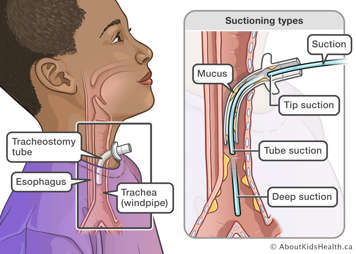
Tube suctioning is done if signs of the need for suctioning are present and secretions are not visible/able to be suctioned by the tip suctioning technique.
-

Gather your equipment and supplies, including oxygen, if available.
-

Make sure the oximeter is on and provides an accurate reading.
Have oxygen available.
-

Make sure the suction machine is at the correct setting.
-

Wash your hands well. Parents and caregivers do not need to wear gloves, although you may choose to do so if you have them. If you have a home nurse visiting, they will bring their own gloves and wear them.
-

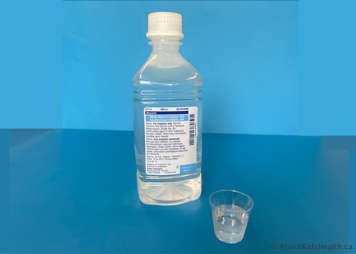
Fill a clean container with sterile water or saline.
-

Make sure your child is in a comfortable position (lying or sitting).
-

Ensure the catheter is the correct size. Open the catheter by pushing the base through the paper packaging.
-

Attach the suction tubing to the correct size suction catheter.
-

Withdraw the catheter from the package slowly just before use. Hold it four to six inches from the end. Do not touch the end of the catheter that goes into the tracheostomy tube.
Remove the ventilator, tracheostomy cap, heat and moisture exchanger (HME), mask or speaking valve from the tracheostomy tube. If necessary, manually ventilate your child with the manual resuscitation bag.
If needed, stabilize the tube. Controlling the suction port with your non-dominant hand and suctioning with your dominant hand is often helpful.
-

Insert the suction catheter into the tracheostomy tube to the length instructed by your health-care team. Make sure your thumb is not touching the suction control port.
Important: If the catheter cannot be passed through the tracheostomy tube during suctioning, a blockage should be suspected and an emergency tracheostomy tube change should be performed.
-

Hold your thumb over the suction control port to apply continuous suction.
-


Slowly remove the suction catheter while "twirling" it between your fingers to remove mucus (10 seconds maximum).
-

Watch the thumb port region to assess the secretion obtained.
Take note of the quality (colour and consistency) of secretions and the quantity of secretions.
-

Clear the suction catheter by suctioning sterile water only if secretions are thick and sticking to the inside of the catheter.
Give your child a break of at least 30 seconds before repeating tube suctioning.
Assess and tend to your child’s respiratory status and oxygen needs after each suction pass. Give your child some big breaths using the manual resuscitation bag if needed. In the event of oxygen desaturation, use oxygen as prescribed by your child’s health-care team.
-

When done, replace the tracheostomy cap, HME, speaking valve or ventilator, if your child uses one.
Once you are finished, suction up sterile water or saline into the catheter (called flushing) to rinse the suction tubing. Discard the catheter. Turn off the suction unit. Discard water.
Empty and clean the suction drainage bottles and containers, if needed.
Wash hands well.
Prepare the suction equipment and supplies for the next use.
Precautions
- The standard of practice in hospital due to infection control policies is to discard suction catheters after one use; however, recognizing the home environment differs and financial considerations, many families choose to reuse suction catheters. In this scenario we suggest, at minimum, rinsing after each suction and only using them for one hour.
- Ensure you rinse/flush the catheter well after use and replace it in the packaging to keep clean.
- Measure the catheter to the length of your child’s tube. Do not go deeper than this unless you are doing an emergency deep suctioning or are instructed to do so by your child's health-care provider.