Ventilator settings
Your child's doctor will prescribe your child's ventilator settings. If the doctor prescribes different settings at a later time, you or your child's healthcare team can adjust the ventilator accordingly.
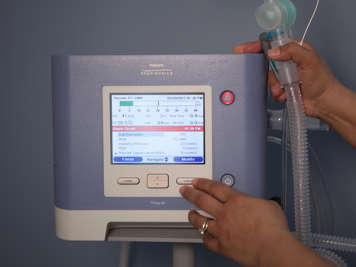
Below are the settings that are common in the Trilogy Respironics 200. If your child uses another model of ventilator, please refer to its user manual.
Inspiratory positive airway pressure (IPAP)
The pre-set pressure to be achieved during inspiration. IPAP applies to S, S/T, T and PC modes only.
Peak inspiratory pressure
The amount of pressure it takes to fill the lungs when your child breathes in
Expiratory positive airway pressure (EPAP)
The preset pressure to be achieved during expiration. EPAP applies to S, S/T, T and PC modes only.
Positive end expiratory pressure (PEEP)
The pre-set pressure to be delivered during inspiration and expiration to keep the air sacs in the lungs open.
Breath rate
The number of mandatory breaths to be delivered to your child in one minute
Pressure support
An optional setting that selects the target pressure for the patient’s spontaneous breaths. It helps the child take a larger breath than they might take on their own.
Tidal volume
The volume of air to be delivered during the volume controlled breaths
Inspiratory time
The length of time the breath is held in the inspiratory phase (breathing in) during volume-controlled or pressure-controlled mandatory breaths
Trigger type: Auto-Trak or Flow Trigger
- With Auto-Trak triggering, the ventilator is set to trigger breaths based on automatic flow thresholds. This improves synchrony between the machine and your child’s breathing. Auto-Trak is only available with passive circuits.
- With a flow trigger, three other settings are used: leak compensation, flow cycle sensitivity and flow trigger sensitivity.
- Leak compensation: The ventilator will automatically compensate for any leaking.
- Flow cycle sensitivity: Determines what percent reduction from peak flow is enough for the ventilator to cycle into exhalation. Adjusting this setting helps with synchrony and managing leaks.
- Flow trigger sensitivity: Determines when the patient’s inspiratory effort (in litres per minute) is enough to trigger a breath to begin.
Inspiratory flow rate
How fast the air travels during one breath
Sensitivity
The amount of effort your child needs to make to trigger the ventilator to deliver a mandatory breath or assist them in taking a spontaneous breath
Rise time
The time it takes the ventilator to change from the expiratory pressure (EPAP) to the inspiratory pressure (IPAP)
It applies only for S, S/T, T and PC, SIMV and PC-SIMV modes.
Minute ventilation
The amount of air that is delivered to your child’s lungs over the previous minute (a calculation of tidal volume and respiratory rate)
I:E ratio (inspiratory to expiratory ratio)
The length of time it takes your child to breathe in compared to the time it takes them to breathe out
Ramp length
The length of time the ventilator takes to go from a starting pressure to the final pre-set pressures
Ramp starting pressure
The starting preset pressure when the ramp is set to “on”

Ventilator alarms
Ventilator alarms are important because they alert you to changes in your child’s settings and measured parameters. The alarm is an important safety measure so that your or your child’s healthcare team can quickly fix any problems.
Most ventilators offer alarms that you can both see and hear. The following table outlines common alarms, their possible causes and how you can respond to them.
| Alarm | Possible causes | What to do |
|---|---|---|
| High pressure |
|
|
| Low pressure |
|
|
| Low minute volume |
|
|
| Power switch over (audiovisual alarm) |
|
|
| Low power |
|
|
| Ventilator failure |
|
|
Alarms available on the Trilogy Respironics ventilator
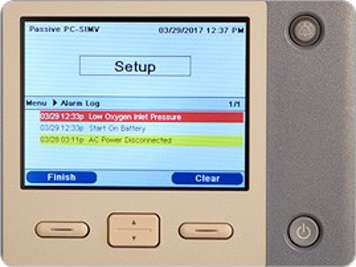
Below are the alarms that are available on the Trilogy Respironics ventilator. Those on the left are set by the machine. Those on the right will be set by your long-term ventilation team.
Note that not all alarms are available in every mode of ventilation.
| Automatically set alarms (machine control) | User-set alarms |
|---|---|
|
|
How to access the settings and alarms menu
From the main screen, use the up/down button to highlight the settings and alarms menus. Press the right arrow button to select a menu. Here you will be able to confirm all your child’s settings and alarms. These are only to be changed by your doctor. Changing settings without a doctor’s prescription can be harmful to your child.