What is the aseptic non-touch technique (ANTT)?
Aseptic means doing a procedure in a clean way to avoid germs that cause infections. The aseptic non-touch technique (ANTT) is used for CVL/PICC dressing and cap changes. This technique will help to prevent introducing germs, which may cause infection in the central venous line (CVL) or peripherally inserted central catheter (PICC).
There are six core principles which help promote safe ANTT.
- Handwashing
- Correct glove use
- Using non-touch technique
- Key part and key site protection
- Aseptic field management
- Key part and key site disinfection
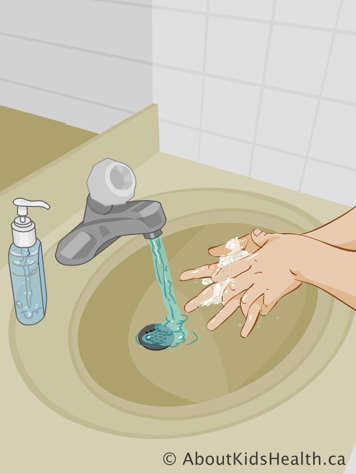
1. Handwashing
- Wash hands using soap and water before starting procedures, between procedure steps and after procedure is finished.
- Hand sanitizer can be used when hands are not visibly soiled.
2. Correct glove use
Use gloves where required to reduce the transmission of harmful bacteria. It is necessary to wear sterile gloves at points during a cap or dressing change where there is greatest risk of contamination of the key site.
3. Using aseptic non-touch technique (ANTT)
ANTT means doing a procedure in a way that keeps germs from entering the child’s body.
The safest way to protect a key part or key site is simply not to touch it. If a key site must be touched, then sterile gloves must be worn.
A sterile item becomes contaminated (has germs on it) when it comes in contact with a non-sterile object. For example, if a sterile glove touches the table surface, it is no longer sterile, and a new pair of sterile gloves must be put on.
When opening packaging, the outside of the package is not sterile, but what is inside the package is sterile.
Sterilized items being touched with sterile gloves still require the use of aseptic non-touch technique.
4. Key-part and key-site protection
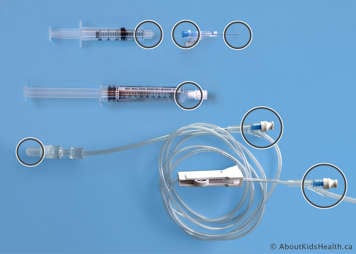
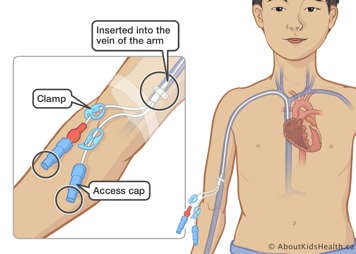
For successful ANTT, aseptic key parts must only come into contact with other aseptic key parts or key sites.
| Key parts | Key sites |
|---|---|
Parts of the equipment that come into contact with:
| Any site where harmful bacteria can enter the child’s body |
Contamination of key parts are indirect ways that harmful bacteria can get into the child’s body. | Contamination of a key site is a direct way that harmful bacteria can get into the child’s body. |
Examples include:
| Examples include:
|
5. Aseptic field management
Ensure that you use a clean and stable surface for all procedures.
Close the windows and door of the room in which you are performing any aseptic procedure. Blowing air may bring germs onto your aseptic area.
You must wear a mask whenever you are doing an aseptic procedure, as bacteria from your nose and mouth may spread.
- Anyone participating in the procedure must also wear a mask, including the child.
- If the child cannot wear a mask, you must keep their head turned away from the CVL or PICC.
Keep supplies protected in their packages for as long as possible until right before they need to be used, to prevent contamination of key parts.
- Open your supplies as close to when needed as possible to keep the supplies protected in the packages.
Store all supplies in a clean dry place.
- All materials must be kept dry as moisture allows for the growth of bacteria.
- If supplies become wet during storage, they must be discarded.
6. Key-part and key-site disinfection
You must disinfect critical parts of equipment or skin that could provide an entry point for harmful bacteria.
Using proper friction (scrubbing) and allowing for the proper time for the solution to dry are the two ways microorganisms are removed.
Watch the clock or use a timer to time scrubbing and drying times, instead of counting out the seconds. We often count faster than we think.
For a line entry:
- To clean key parts such as medication ports on tubing or caps, use ≥70% isopropyl alcohol swabs. Scrub the cap or medication port for 15 seconds and let dry for an additional 15 seconds. Line to line entry/medication administration.
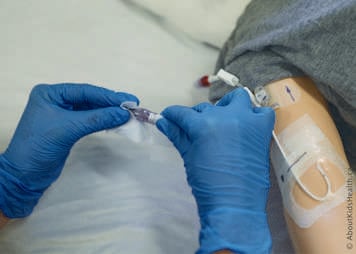
For a cap change:
- To clean the cap for a cap change, use ≥70% isopropyl alcohol swabs. Scrub the cap for 15-30 seconds and let dry for an additional 15-30 seconds.
- For detailed instructions on how to perform a cap change procedure, please see the video CVAD procedures: Cap change.
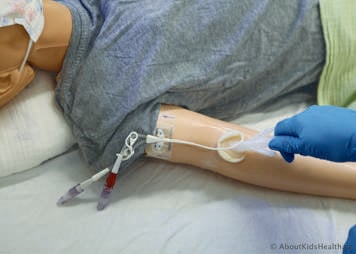
For a dressing change:
- For cleaning solutions to be effective on the skin, you will need to actively scrub the skin for 30 seconds and allow it to air dry for at least two minutes.
- Use 2% chlorhexidine gluconate (CHG) with ≥70% isopropyl alcohol sponge/solution or 10% povidone-iodine solution (also called Betadine). Scrub the skin with friction using a back-and-forth motion for 30 seconds and allow it to dry for at least two minutes.
- Do not fan to dry as this may introduce bacteria into the clean area.
- For detailed instructions on how to perform a dressing change procedure,
please see the video
CVAD procedures: Dressing change.