Once your child has a tracheostomy tube inserted, you will need to change it regularly.
Routine tracheostomy tube changes are important to prevent mucus from building up and prevent granulation tissue from forming around the tube. Granulation tissue is the natural build-up of skin cells on the surface of a cut or incision, or may be a reaction to the plastic in the tracheostomy tube.
You will also need to change your child’s tracheostomy tube in case of emergency, for instance if your child has trouble breathing or the tube accidentally falls out.
How often should I change my child’s tracheostomy tube?
Do a routine tracheostomy tube change once a week. In some cases, you will change the tube once every two weeks. Your child’s healthcare team will tell you exactly how often your child will need to have their tube changed. The healthcare team will also advise you how often you should throw out used tracheostomy tubes and replace them with new ones.
How long does it take to change a tracheostomy tube?
Once you are familiar with the process, a routine tracheostomy change will take about 20 to 30 minutes from start to finish.
Can I change my child’s tracheostomy tube on my own?
Routine tracheostomy tube changes should be performed by two people: a main person and an assistant. In case of emergency, one person may perform a tracheostomy tube change.
Below, you will learn:
- which
supplies to gather before you start
- how to change the tracheostomy tube quickly and smoothly
- how to change tracheostomy ties and dressings.
Before you start
- Change the tube at least 30 minutes before or 30 to 60 minutes after your child feeds. This reduces the risk of choking, coughing or breathing difficulties.
- Make sure that the oximeter is applied and your child’s oxygen saturations are at their baseline.
- Identify the main person and assistant roles.
- Gather your supplies (see below).
What supplies do I need to have in place?
Your supplies include:
- your child’s tracheostomy change kit
- cleaning supplies kit
- additional equipment and supplies.
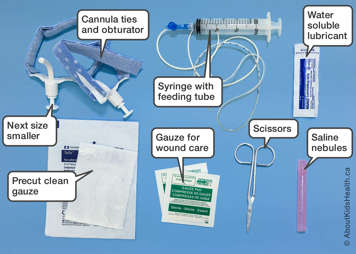
Tracheostomy kit
- Tracheostomy outer cannula with ties attached and obturator of the same size
- Tracheostomy tube one size smaller with ties attached and obturator (store in a small, well-labelled clear bag)
- Normal saline nebules (small, sealed tubes that are filled with saline)
- Water soluble lubricant
- Round-ended scissors
- Clean tracheostomy gauze (dressing)
- Manual suction setup: 20 mL syringe with feeding tube attached (in case the suction machine does not work)
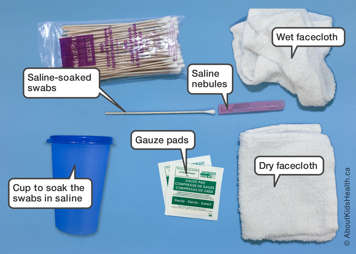
Cleaning supplies
- Gauze pads
- Saline soaked cotton swabs (single use)
- Saline nebules
- Wet facecloth
- Dry facecloth
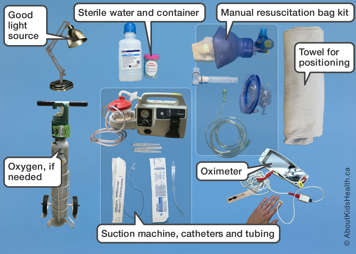
Additional equipment and supplies
- Wound care supplies, if needed
- Suction machine, suction catheters/adjuncts and tubing
- Sterile water and container
- Good light source
- Manual resuscitation bag with tracheostomy adaptor and the appropriate size mask
- Oximeter
- Oxygen, if needed
How do I change the tracheostomy tube?
-

Explain to your child what you are going to do. For babies, make sure they are calm and settled.
-

Wash your hands.
-

Make sure the oximeter probe is on your child and oxygen saturations are at their baseline. The probe may be placed on an older child's toe or finger or around a baby's foot.
-

Inspect the clean tracheostomy tube to make sure there are no cracks or discolorations. If there are any cracks or discolorations, throw this tracheostomy tube out and use a new tracheostomy tube. Check that the tracheostomy tube is the correct size.
-

Check that the obturator goes into and out of the outer cannula smoothly and keeps the shaft of the tracheostomy tube centered.
-

Wet the inside of the outer cannula with normal saline or lubricate the obturator and place it in and out of the cannula to lubricate the cannula.
-

Prepare the tracheostomy tube for insertion by putting a small amount of water soluble lubricant on the outside of the tube.
-

Lay the tracheostomy tube down on a piece of gauze or sterile towel with shaft pointing upwards. This will keep the tube clean before insertion.
Lay your child on their back. Put a roll or blanket under the child’s shoulders to tilt the head back and extend the neck. Older children may prefer to sit up, but make sure that their head and back are supported.
-

Suction the tracheostomy tube so your child's airway is clear before you insert the new tube.
-

Divide the remaining tasks between the main person and assistant, as follows.
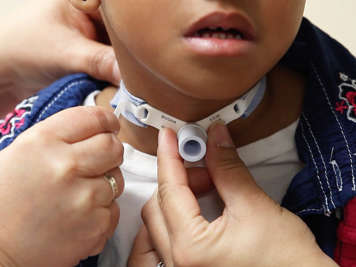


With the other hand, make sure the obturator is inside.
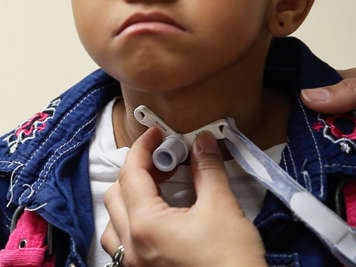


Wipe the stoma if there are secretions in the hole.


Do not discard the obturator. It will be cleaned and reused, so keep it in a safe place where you can easily find it.


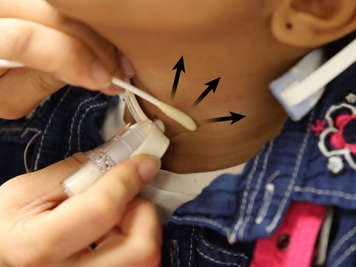
Once the skin is clean and dry, secure the ties at the back and on each side of the flanges. Leave a one-finger gap between the ties and skin.


Main person
Clean, dry and prepare the used tracheostomy tube for the tracheostomy kit right away.
How do I change tracheostomy ties and dressings?
Keeping the tracheostomy ties clean and dry will prevent skin irritation, sores and skin infections around the neck. Ties should be changed once a day, or more often if they are dirty.
There should always be two people present when changing the ties. One person will hold the tracheostomy tube in place while the other person will clean the skin and change the ties. If a second person is not around to help, attach the clean ties before you remove the old ones.
Before you start
- Identify and assign the main person and assistant roles.
- Gather your supplies:
- new tracheostomy ties
- tweezers
- tracheostomy gauze, if needed
- scissors
- suction machine, suction catheters/adjuncts and suction tubing
- your child’s emergency tracheostomy kit
- oximeter
- oxygen, if applicable
- manual resuscitation bag.
Changing Velcro tracheostomy ties
-

Make sure your child is in a comfortable position.
-
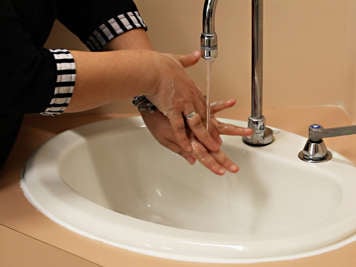
Wash your hands.
-

Make sure the oximeter is on your child and oxygen saturations are at their baseline.
-

Have the assistant hold the tracheostomy tube in place by gently holding onto the flange.
-

Remove the old Velcro tie from one side.
-

Insert and secure the new Velcro strap into the same neck plate hole. If necessary, use the tweezers to pull the tie through the hole.
-

Remove the old Velcro tie from the other side.
-

Insert and secure the new Velcro strap into the neck plate hole.
-

Adjust the ties to fit your child’s neck.
-

You should be able to fit one finger between the tie and your child’s neck. Your finger should be able to go all the way around the neck.
-

Wash your hands.